Paper Handling: Cutting Washi with Care
2024 Oct 7th
Given the task of dividing a large sheet of paper into smaller, more manageable sizes, what do you do? Your first thought may be to use a straight edge and a utility knife. When it comes to breaking down a sheet of washi, with its longer, stronger fibres, only a very sharp knife will do, and you will be left with a rather harsh edge that does not reflect the true character of washi. There are other methods that will allow you to cut with accuracy while maintaining a softer, more natural edge.
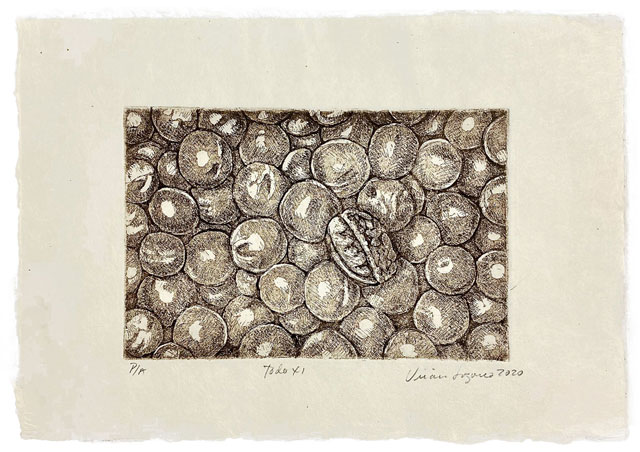
Etching on Nishinouchi White Naka Ban, cut into smaller size (9.25 x 6.5")
Also, if you are prepping for an edition, you may want to maintain an edge that somewhat mimics the naturally occurring deckle edge found on full sheets of handmade paper. So, what is an artist to do? Let us share some tried and true techniques for “cutting” a full sheet of washi into the smaller pieces you need.
Paper Slitting with a Knife
Paper slitting with a knife is a clean, swift, and accurate way to divide your sheet of washi – and you won't even need a straight edge! A slitting knife most closely resembles a kitchen paring knife (and paring knives work wonderfully). Although specialty tools are nice to have, it is not essential to purchase a professional paper slitting knife to achieve good results. For our purposes the following instruction describes dividing a sheet of washi in half, but the same technique can be applied to create smaller pieces by repeating the process.
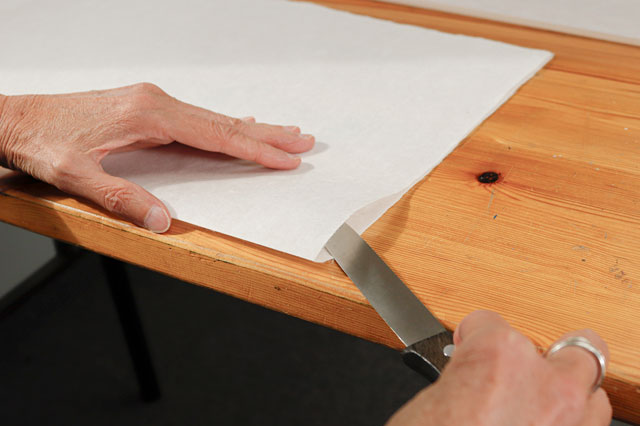
- Fold the paper in half.
- Lightly burnish the crease.
- Position the fold right at the edge of the table so that the fold and the table edge are in line.
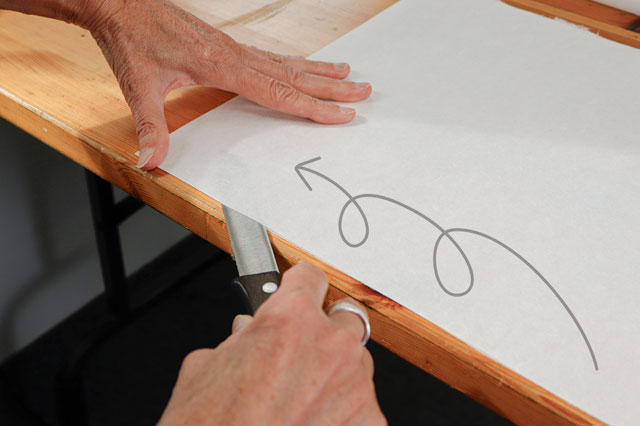
- Holding the paper in place with the flat of your non-dominant hand and holding the slitting knife almost parallel to the table, slide the blade between the top and bottom half of the paper.
- Start to slit by moving the knife in a steady circular sweeping pattern along the length of the fold.
- Do not pull the knife in a single straight slice through the paper, the results will be rough and could encourage tearing.
- This method requires a gentle, steady action. Be aware of your movements in relation to your body, no one wants to get blood on their washi!
- Voilà! Two equal pieces of washi with a slightly fibrous edge.
Paper Tearing with a Wet Brush
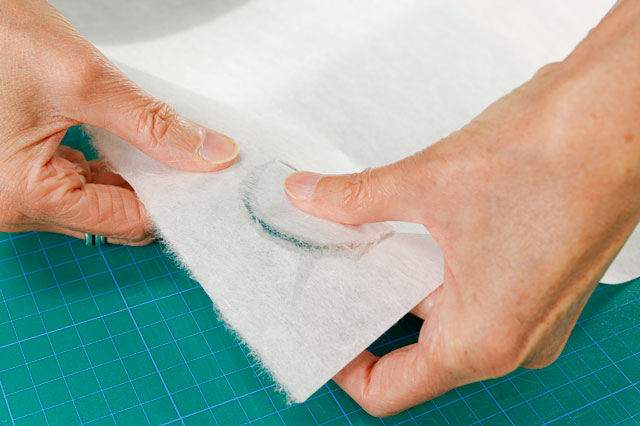
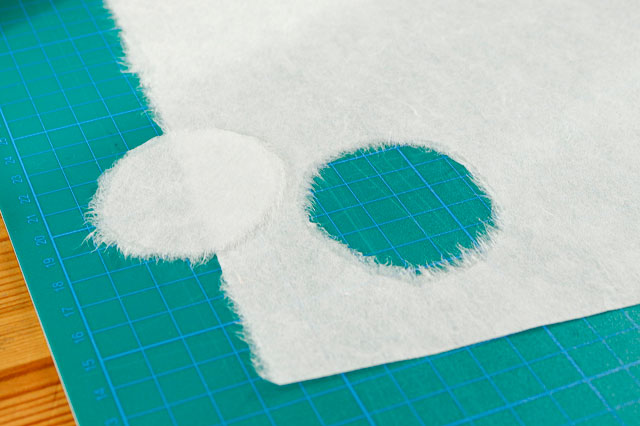
Water tearing works exceptionally well if you want to showcase a soft, fibrous quality on your cut pieces. This technique is most commonly used in chigiri-e (torn-paper art), when a softer edge is desired. With some practice, this technique allows you to tear shapes, curves, waves, even circles. It can also be used for creating a straight edge, but again, practice on shorter lengths first.
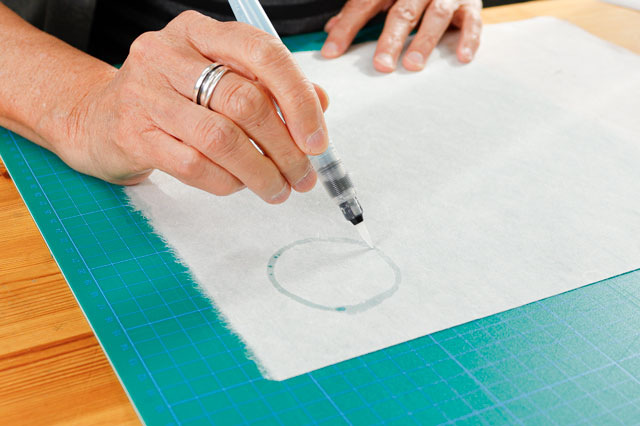
For Chigiri-e
- Trace the desired shape with a wet watercolour brush; a brush with a water reservoir in the handle works well. (We suggest CSS9700 Brush - Water)
- Make sure your paper is supported by the table.
- Stabilizing one edge of the desired tear with your non-dominant hand, gently pull the other side away from the wet line. You can do this by using your fingertips (for a shorter cut) or palm (for something larger) and pulling the paper away from the water line against the tabletop. The paper will separate where it has been wet. Slow and steady is the key to a successful division of paper.
- For a curved shape, like a circle, you may find it easier to hold the paper slightly aloft, supporting both the area to be torn, and the rest of the paper with your hands and fingers.
For a Straight Line
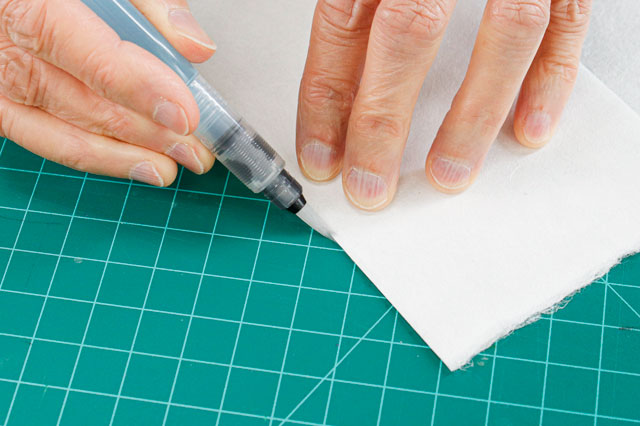
- Fold your paper in half.
- Lightly burnish the crease
- Using a dampened watercolour brush or a brush with a water reservoir in the handle (we suggest CSS9700 Brush - Water) carefully trace the fold. You want to dampen the fold, but not soak it. Too much water will be quickly absorbed and will spread. You want a fine line of water right on the crease.
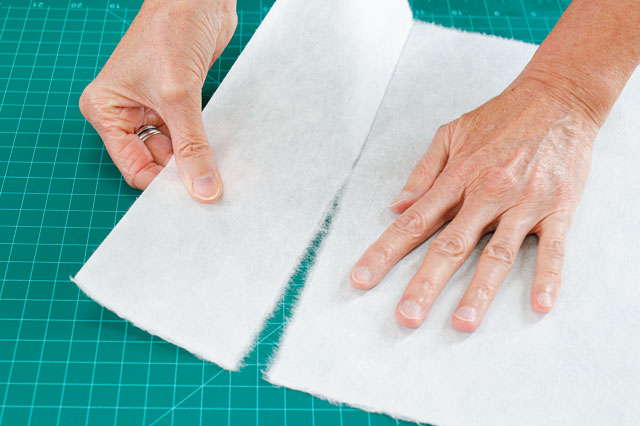
- Open the paper flat on the tabletop and place your hands on either side of the fold. Using gentle consistent force, you will use the weight of your hands to separate the sheet along the fold line. Slow and steady is the key. If you meet a lot of resistance, you may need to add more water. However, if too much water has been used, you may find that the tear becomes uneven as it follows the path of least resistance where the paper is wettest and may not follow the original crease.
Cutting Very Fibrous Washi
Some washi has very tough fibrous inclusions, NAT1995 Yasu Natural or LRG3264 Haruki - Roll, for example. The difference in texture from inclusion to paper is enough to cause issues both when trying to slit the paper or divide it using the water brush method. A utility knife can do the job beautifully, as long as the blade is sharp. We have discovered that a good-quality rotary cutter also works like a charm. Most importantly, for either tool, is that the blade be sharp. The resulting cut edge will be straight and “hard” but in this case, that is better than irregular tears or splits.

- Determine where you want to slit your paper.
- Lay the paper so that the cut line is perpendicular to the end of the table. A self-healing cutting mat is useful placed under the paper to protect the table surface.
- Use a metal straight edge as a guide.
- Place your non-dominant hand on the ruler, make sure no fingertips extend past the edge.
- Starting at the edge of the paper farthest from you, set the blade of your utility knife or cutting wheel against the straight edge.
- Applying firm and steady downward pressure, draw the rotary cutter towards you.
- Keep the straightedge in place in case a second pass is required to get through all the fibre. This point cannot be emphasized strongly enough!
Over time, anyone who handles sheets of paper regularly will develop these skills, and will, no doubt, settle on their favourite techniques. Have you tried any of these methods? Do you have a favourite method? Or a tale of paper cutting gone wrong? We would love to hear from you. If you have questions about paper handling, your representative will be happy to help: Email Tara / Paula

